Administration Menu
This menu is visible only to users having the Admin role.
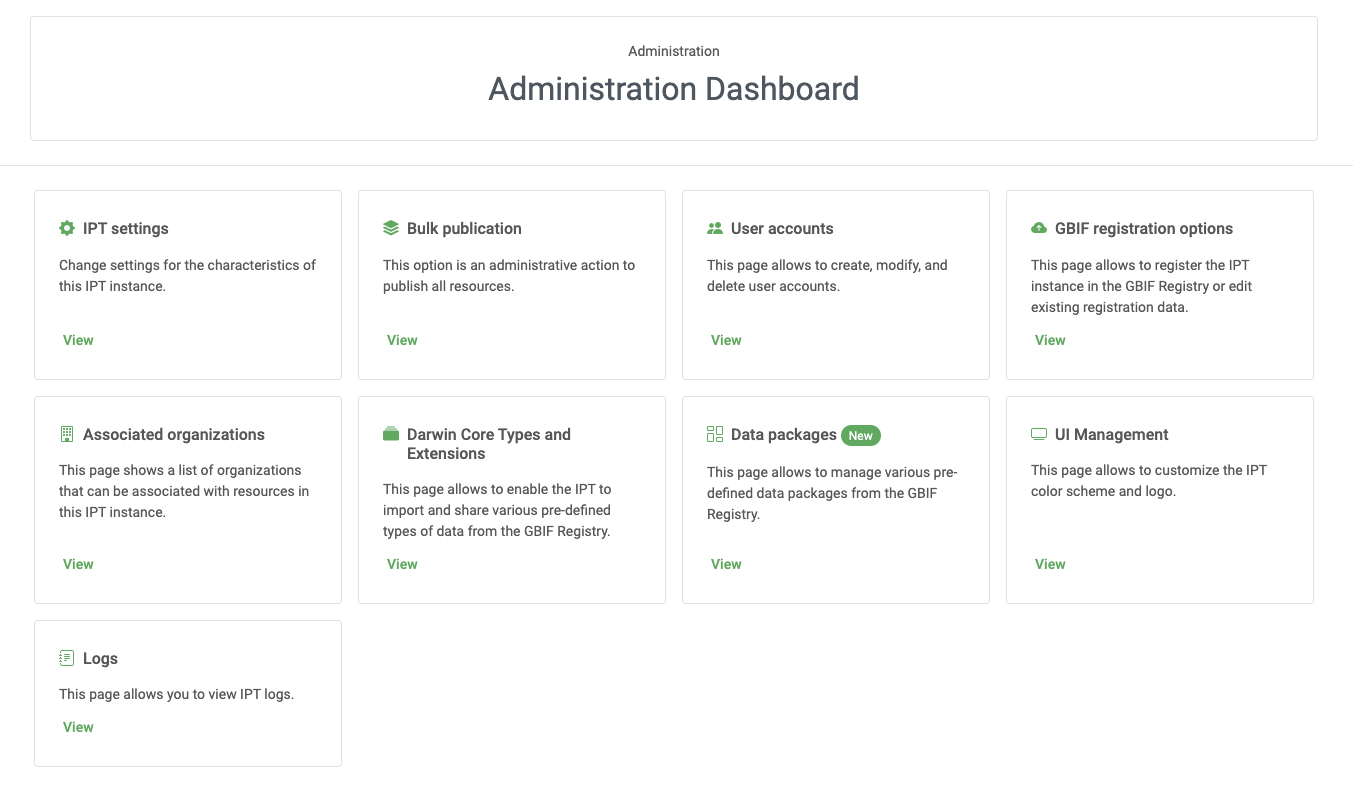
This section describes each of the functions that are accessible from the Administration menu. Clicking on the Administration menu opens a page (see screen image, below) from which each of these specific administrative tasks can be accessed by clicking on the appropriate button.
Configure IPT settings
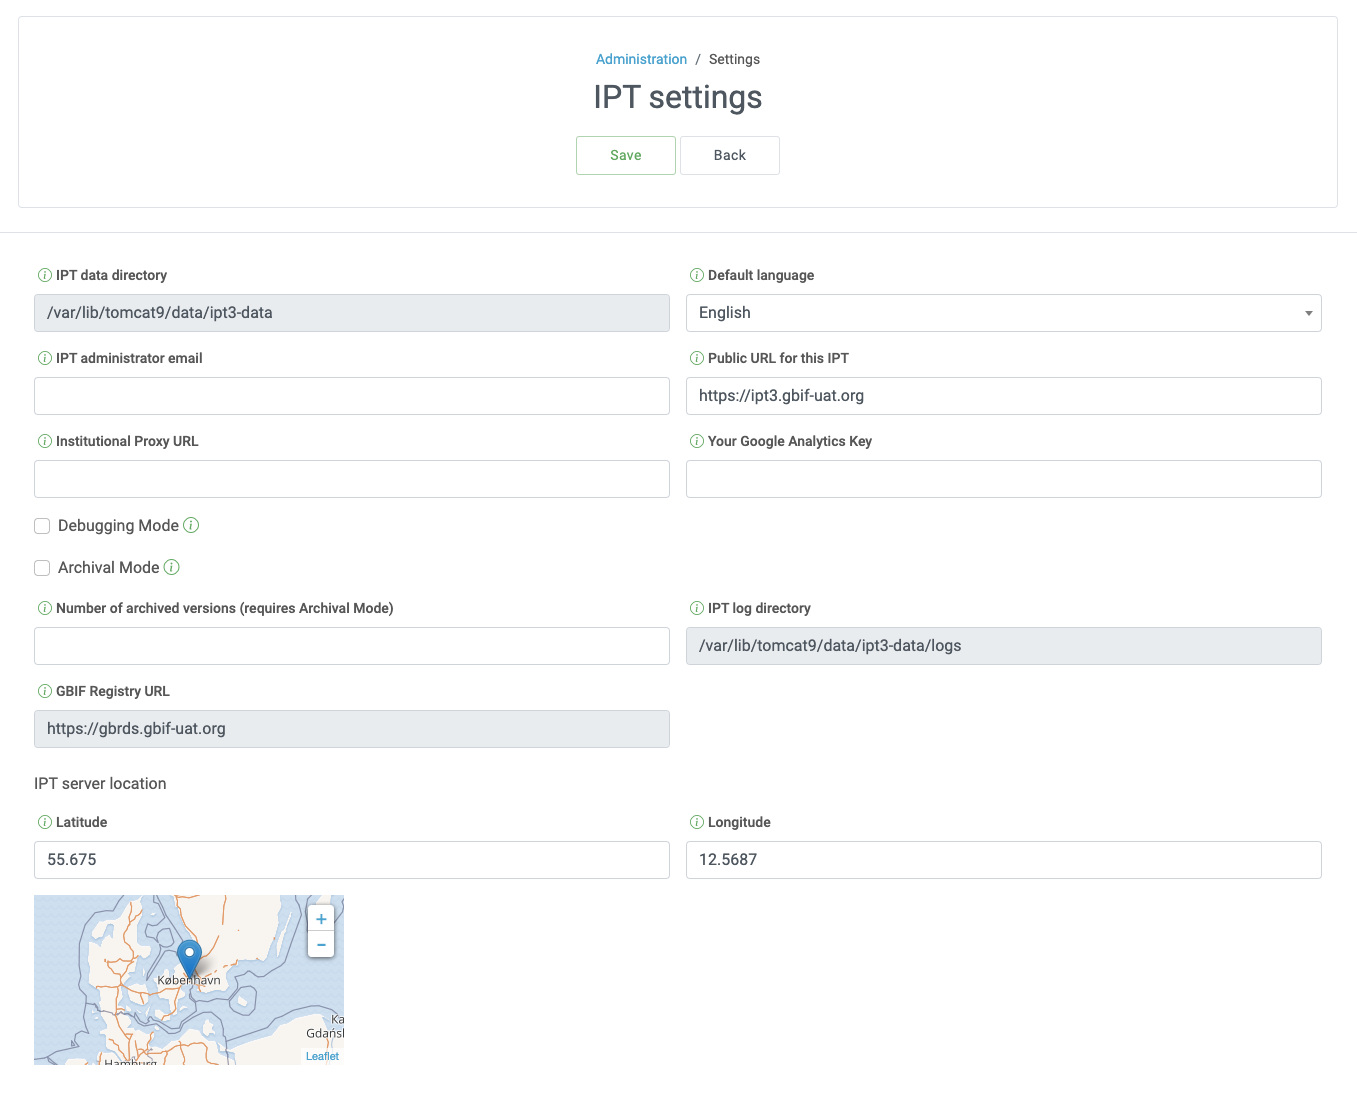
This page allows a user having the Admin role to make and change settings for the characteristics of this IPT instance.

-
IPT data directory - This shows the directory on the server where all the IPT’s configuration, resources and log files are stored.
-
Default language - This shows the default IPT language. English by default.
-
IPT administrator email - This is the email shown on the login page to users who have forgotten their password. If it is not set, the first administrator user’s email is used.
-
Public URL - This is the URL that points to the root of this IPT installation. The URL is set automatically during the installation of the IPT. The Public URL must be accessible via the Internet in order for the IPT to function fully. Configuring the IPT Public URL to use localhost, for example, will not allow the instance of the IPT to be registered with GBIF, will not allow the IPT to be associated with an organization and will not allow the resources to be publicly accessible.
Manually updating the Public URLThe IPT tests the Public URL for accessibility from the client computer when the IPT Settings are saved. If the IPT is not accessible at the given Public URL, the IPT will display a warning message and the changes will not be saved. The procedure to change the Public URL if the new URL is not yet functional (such as a port change that requires the IPT to be restarted) is given here:
-
shut down the IPT.
-
in the data directory for the IPT, open the file
config/ipt.propertieswith a simple or programming text editor such as Notepad, TextEdit, vim (not Microsoft Word). -
in the
ipt.propertiesfile, change the line starting withipt.baseURLto the new URL with the new port, using the backslash to escape the colon character. For example, enteript.baseURL=http\://example.org\:7001/iptfor http://example.org:7001/ipt. -
restart the IPT in the servlet container.
-
update the metadata for the IPT as described in the next section of this user manual entitled "Publish all resources".
-
-
Institutional proxy URL - If the server on which the IPT is installed does not have direct HTTP/HTTPS access to the Internet, but instead must route outbound HTTP/HTTPS requests through an institutional proxy server, enter the host address and port number here. For example,
http://proxy.example.org:8080. -
Google Analytics key - If you would like to track the use of your instance of the IPT with Google Analytics, you can enable it to do so by entering your Google Analytics key in this text box. For more information about Google Analytics, see https://www.google.com/intl/en/analytics/.
-
Debugging Mode - Check this box if you would like the IPT to begin logging in the verbose debugging mode. Debugging mode is generally unnecessary unless you are trying to track a problem with the IPT. The IPT log file is located in the file debug.log in the IPT’s data directory. The data directory is set during the first step in the installation process (see the Getting Started Guide). Refer to the information under the "View IPT logs" heading of the "Administration Menus" section for an easy way for users having the Admin role to view the debug.log file.
-
Archival Mode - Check this box if you want your IPT to archive all published versions for all resources. It will enable you to track a resource’s version history. If unchecked, older versions will be overwritten with the latest. Beware not to run out of disk space.
-
Number of archived versions - When archival mode is enabled, setting this configuration value to a number will keep that many old versions, but automatically delete older versions.
-
IPT Server Location - This area of the page allows the Admin to set the geographic coordinates (latitude and longitude) of the location of the server on which the IPT is installed. Setting these coordinates allows GBIF to map the location of this among other registered IPT installations around the world.
-
Logo redirect URL - Enable redirection from the main logo to another location, with the default set to the IPT public URL.
Publish all resources
This option is an administrative action just like the Publish button, only it publishes ALL resources. Therefore for each resource, it creates a new DwC-A, EML, and RTF, and broadcasts the update to the Registry and via RSS. In addition, it also updates the IPT and registered resources' metadata in the Registry. Click on this button if multiple resources have been updated and you want to publish a new release for all of them instead of publishing them individually.
Configure User accounts
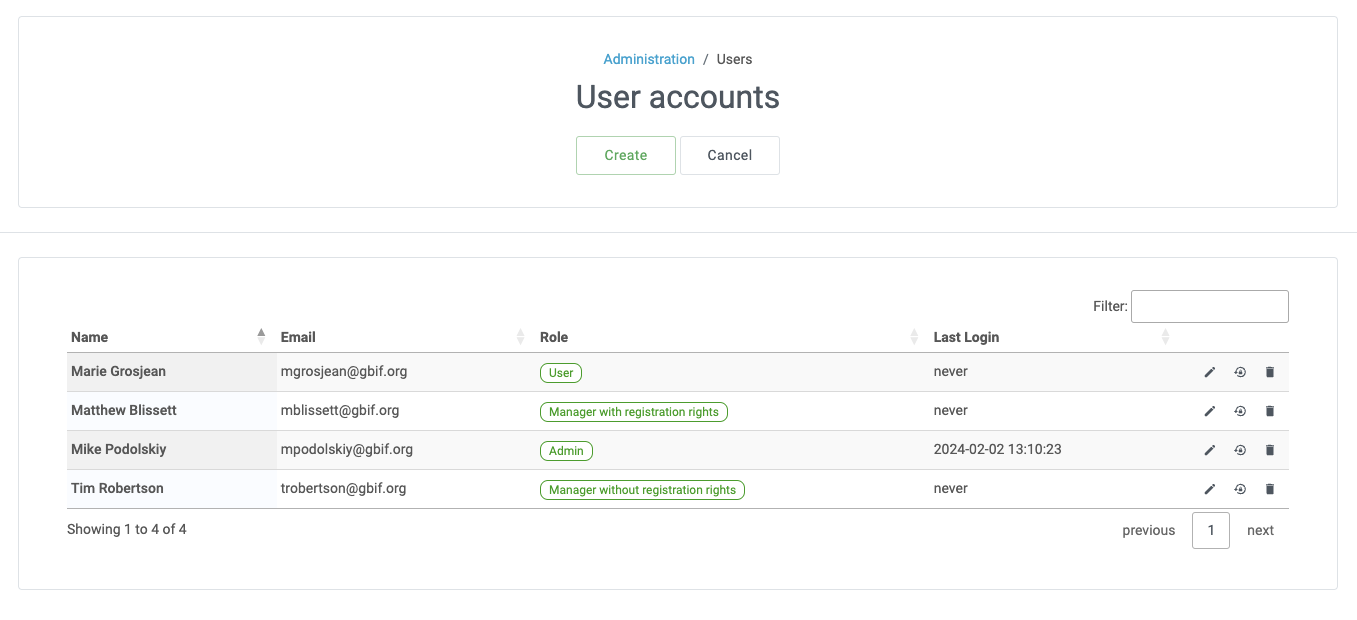
This page allows users having the Admin role to create, modify, and delete user accounts. When the page is opened, it shows a table of existing users and basic information about them including their names, email addresses, roles, and the date and time of their last logins. Users can be deleted or passwords reset by clicking on icons on the right side.
Create a new user
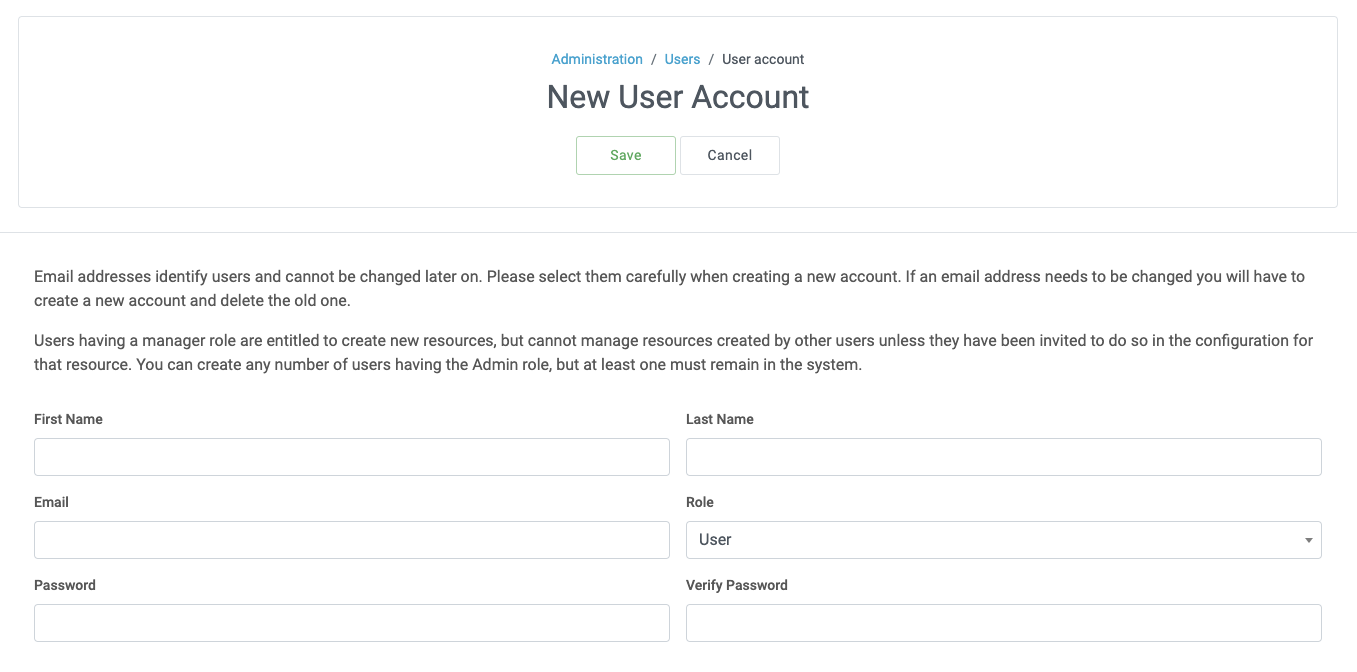
A new user can be created by clicking on the button labelled "Create" below the list of existing users. This will open a page on which the information about the user can be entered, after which the new user can be created by clicking on the button labelled "Save".
-
Email - The current email address of the user is used as an identifier to log in within the IPT and can not be changed.
If the user requires a change of email address, the recommended procedure is to create a new user account with the new email address, then delete the user account having the antiquated email address.
-
First name - The first name of the user.
-
Last name - The last name of the user.
-
Role - The role the user will have with respect to this installation of the IPT. Admin users can make changes to all aspects of the instance of the IPT. Users having the role "Manager without registration rights" are able to create, edit, remove, and manage resources they have created or have been invited to manage within the IPT instance. Users having the role "Manager with registration rights" have the additional capability to register resources with the GBIF network. Other users can log in to the IPT and view resources, but cannot make any changes.
-
Password - The password for the user must consist of at least four characters and should be made secure and safe from loss, as it is not recoverable from the IPT application.
If a user’s password is lost, it can be reset to an automatically generated new value by a user having the Admin role. It is the responsibility of the Admin user to communicate this new password to the user for whom it was reset. The user can then change the password to the desired value by entering it in the IPT Account page accessible through the "Account" link in the header in the upper right corner of every page after logging in.
-
Verify password - An exact copy of the password as entered in the Password text box to confirm that it was entered as intended.
After creation, an email with credential can be sent to the user:

Modify an existing user
Information about users can be changed in the user details page after selecting the name of the user you wish to modify from the list of existing users. The user detail page shows all of the information about that user. The first name, last name, and role for the user can be changed by entering the new values and clicking on the button labelled "Save". Details of the information to be entered on this page can be found in the explanations in the "Create a new user" section, above.
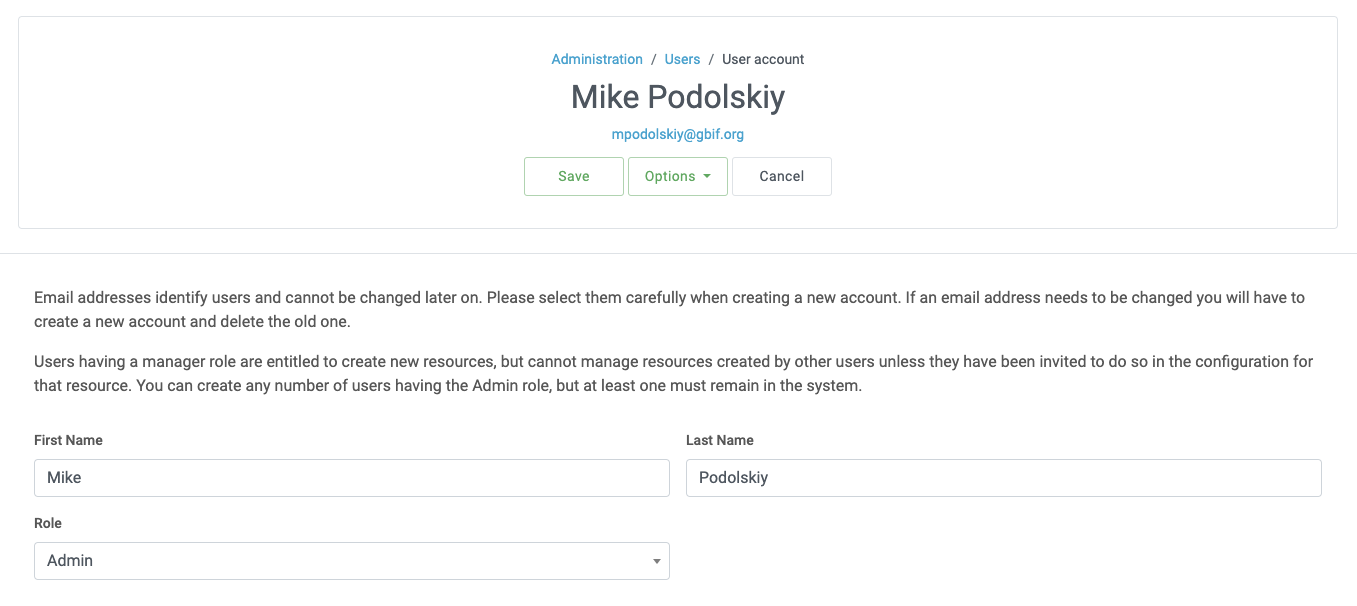
The Options dropdown contains to buttons:
-
Reset password - If a user forgets a password, clicking on the button labelled "Reset Password" can generate a new one, after which a new password is given in an information message at the top of the page.
-
Delete - delete current user.
The IPT does not inform the affected user of this change, so it is the responsibility of the Admin who resets the password to inform the user of the new one.
After password reset, an email with a new password can be sent to the user:

Delete a user
Users accounts that are no longer necessary can be deleted using the user detail page accessed by selecting the name of the user you wish to delete from the list of existing users. On the bottom of the user detail page, click on the button labelled "Delete" to remove this user account. There are several conditions under which a user cannot be deleted:
-
An admin cannot delete their own account while logged in therefore it must be deleted by another admin.
-
The IPT installation must always have at least one user having the Admin role, so the last remaining Admin can not be deleted. To remove that user, first create a new user having the Admin role and log in with that new user to delete the other Admin account.
-
Each resource must have at least one associated user having either the Admin or one of the Manager roles, so the last remaining Manager of a resource can not be deleted. To remove that user, first associate another user having the Admin or one of the Manager roles with any resources for which the user you wish to delete is the last remaining manager. Refer to the information under Resource Managers to see how new managers can be assigned.
-
A user cannot be deleted if it is the creator or one or more resources. To restrict the user’s access to their resources, downgrade their role to type User. Refer to the Modify an existing user section for information about how to change a user’s role.
Configure GBIF registration options
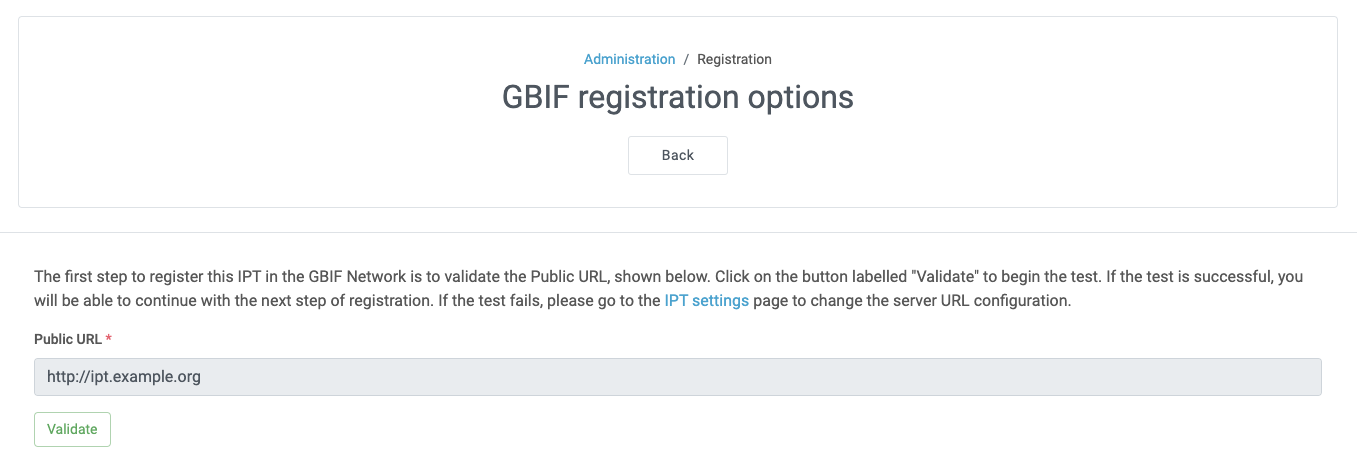
This page allows a user to register the IPT instance in the GBIF Registry if this has not already been done. The IPT must be registered before any of the IPTs resources can be associated with an organization (see the information under the "Configure Organizations" heading in the "Administration Menu" section) or published (see the Published Versions section). Information about a registered IPT and its public resources become searchable through the Registry’s services, and the data from the public resources published on the IPT can be indexed for searching via the GBIF portal. If the IPT has already been registered, the registered information for the IPT can be edited opening the Edit GBIF registration page.
The first step to register with GBIF is to test that the IPT has a valid URL that can be reached by the GBIF services. To run this test, click on the button labelled "Validate".
If the validation test is unsuccessful, an error message will suggest the nature of the problem with the communication between the GBIF Registry and the IPT. Causes for an error include:
-
No Internet connectivity - The IPT requires an active Internet connection to function properly. An error will occur if connectivity to the Internet is lost when the button labelled "Validate" button is clicked. Restore Internet connectivity before trying to proceed with registration.
-
Incorrect Public or Institutional proxy URL - The public URL is automatically detected and configured during the IPT setup process (see the Initial Setup section). Changes in the configuration of the server on which the IPT is installed could require a change in the public URL or the institutional proxy URL. The public and institutional proxy URLs can be changed on the Configure IPT Settings page (see the explanations for public URL and institutional proxy URL in the Configure IPT settings section).
-
Firewall - If the Internet connection is live, a firewall may be preventing connections to the public URL or institutional proxy. Change the firewall or institutional proxy settings to all outside connections.
-
GBIF Registry inaccessible - If an error message suggests that none of the previous errors has occurred and yet there is a failure to communicate with the GBIF Registry, please report that there are problems connecting to the GBIF registry to the GBIF Help Desk (helpdesk@gbif.org).
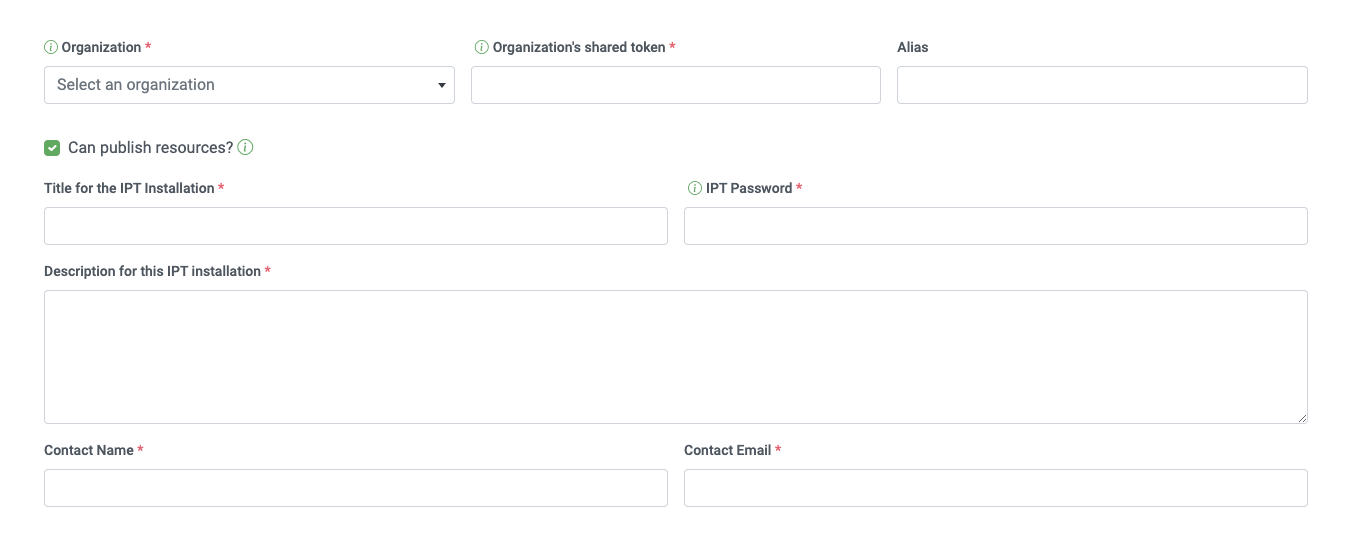
If the IPT passes the validation step above, a form showing additional information required for registration is presented. In this step, the IPT instance is associated to an organization. The organization must already be registered in the GBIF Registry, and its shared token must be known. For explanations of the fields and selections on this form, refer to the information below.
Following are explanations of the specific information to select or enter:
-
Organization - the select box contains a list of organizations in the GBIF registry. Select the single organization with which this IPT instance will be associated. If you are unable to find the organization you seek on the list, use the GBIF Registry (https://www.gbif.org/publisher/search) to determine if the organization is registered under a name other than what you expected. If the organization is not yet registered with GBIF, please contact the GBIF Help Desk to register the organization before proceeding with the registration of the IPT. Click on the help icon and then click on the helpful GBIF Help Desk link to open up an email template in your default mail client that you just have to fill in the required information before sending.
-
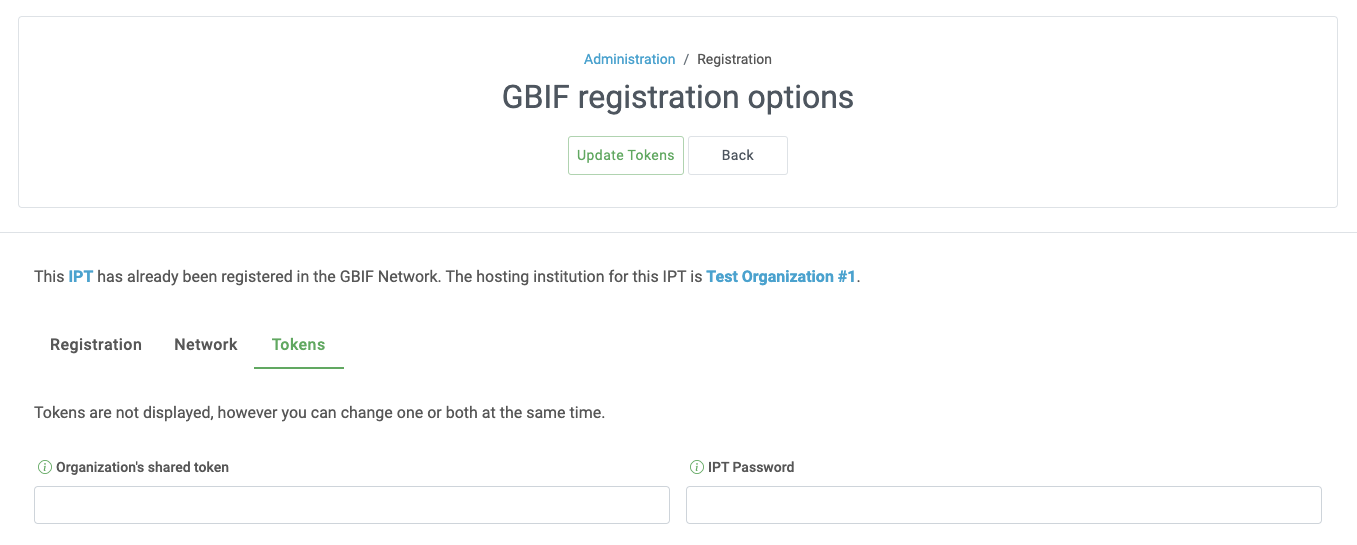
Organization’s shared token - the shared token registered in the GBIF registry for the selected organization must be entered in this text box to verify that the user has the authorization required to associate the IPT instance with that organization. If you do not have to the organization’s shared token, you can request it from the registered contact. A link to the primary contact on record for the organization will appear below the Organization’s Shared Token text box after selecting an organization in the Organization select box. The shared token will be used to authenticate the IPT registration when the button labelled "Save" is clicked.
-
Alias - enter a convenient name or code to represent the organization within this instance of the IPT. The alias will appear in place of the full organization name in organization select boxes in the IPT user interfaces.
-
Can publish resources? - check this box if the selected organization can also be associated with resources published on this instance of the IPT. If left unchecked, the organization will not appear in the list of organizations available to associate with a resource. Leave unchecked only if this organization is only the host for the IPT instance, not for any of the resources published through the IPT instance.
-
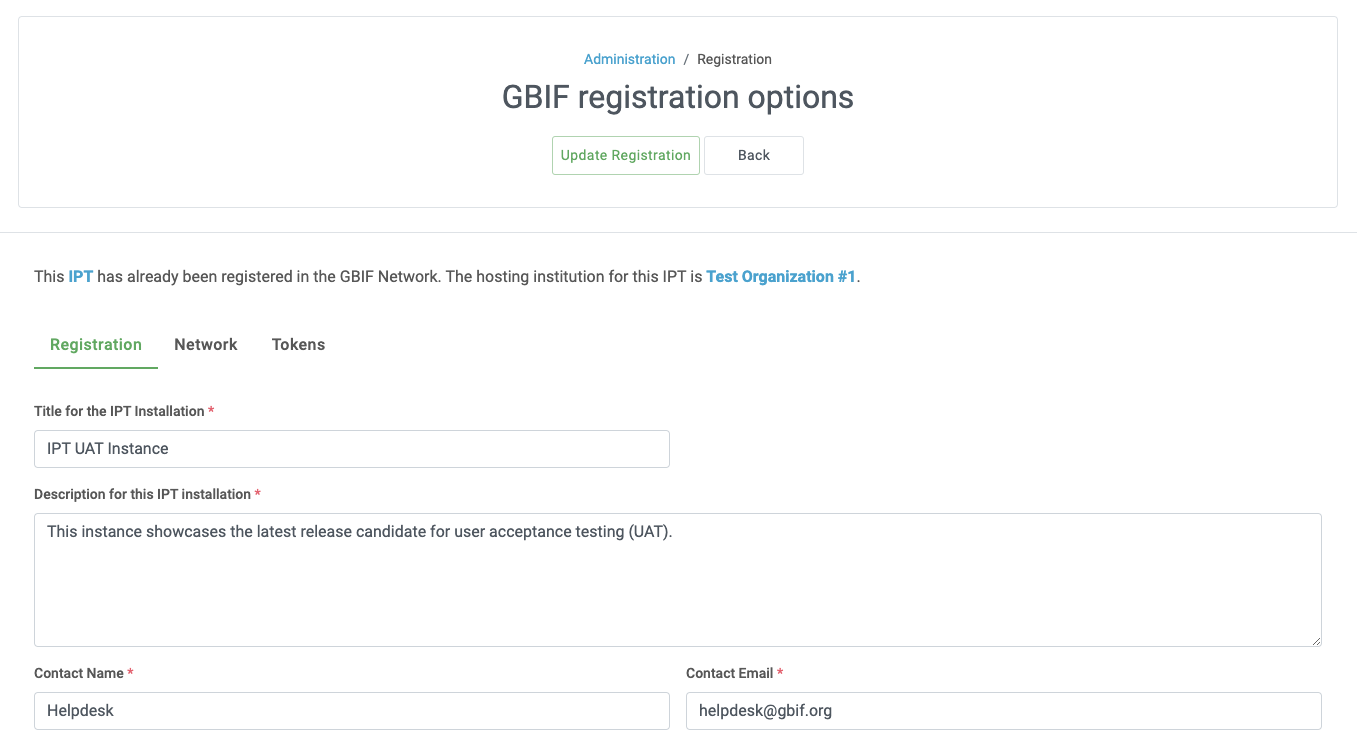
Title for the IPT installation - enter the title of the IPT installation to be used in the GBIF Registry. The title is the primary information used for listing and searching for the IPT installations in the Registry.
-
Description for this IPT installation - enter the description of the IPT installation to be used in the GBIF Registry. The description is meant to help users of the Registry to further understand the significance of the IPT instance by allowing further information beyond the specific metadata fields to be shared.
-
Contact Name - enter the name of the person who should be contacted for information about the IPT installation. This person should be someone who has an Admin role in the IPT instance and knows the technical details about the installation.
-
Contact Email - enter the current email address of the person whose name is given in the Contact Name.
-
IPT password - enter the password that should be used to edit the entry for this IPT installation in the GBIF Registry.
-
Save - when all of the information above is entered or selected, click on the button labelled "Save" to register the IPT installation with the GBIF Registry. After successfully registering the IPT installation, the Configure GBIF registration page will show that the IPT has already been registered and associated with the selected organization. Also, after a successful registration, the Configure Organizations page will become accessible from the Administration menu.
-
Note: Any changes to the IPT registration (rather than resource registration - for which see the "Visibility" section under the "Resource Overview" heading in the "Manage Resources Menu" section as well as the information under the "Publish all resources" heading in the "Administration Menu" section) will have to be done in consultation with the GBIF Help Desk (helpdesk@gbif.org).
Edit GBIF registration
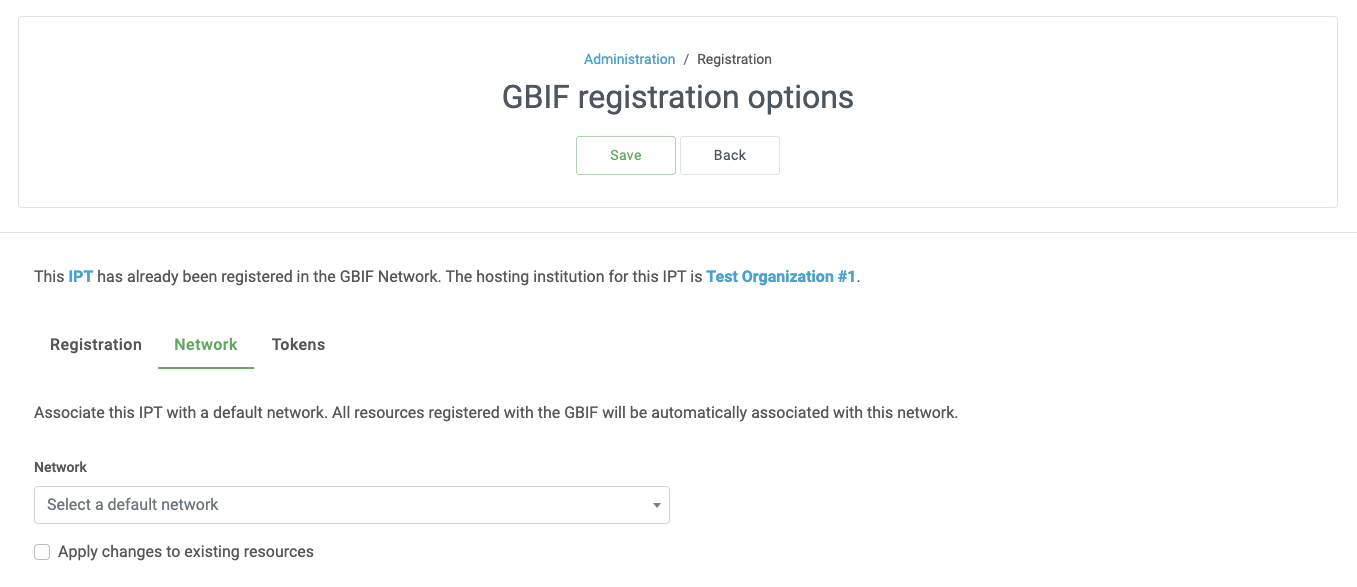
After the IPT has been registered, this page allows a user to update the IPT registration information. The update will ensure the IPT and all its registered resources are in sync with the GBIF Registry. Administrators should run an update each time the public URL of the IPT changes. Administrators can also run an update in order to update the title, description, contact name, and contact email of the IPT instance. This page does not support changing the hosting organization. To do so, administrators must contact the GBIF Help Desk (helpdesk@gbif.org) directly.
Network view:
Edit organization’s shared tokens view:
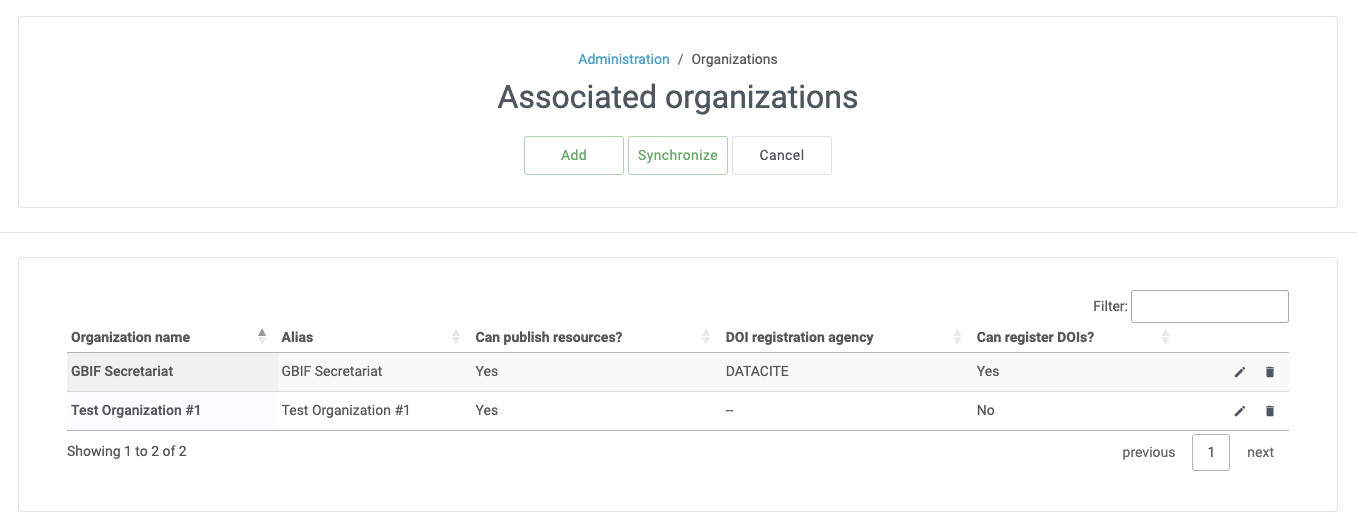
Configure Organizations
This page is unavailable until the IPT instance has been successfully registered in the GBIF Registry (see the information under the "Configure GBIF registration" heading of the "Administration Menu" section). Once registered, this page shows a list of organizations that can be associated with resources in this IPT instance. An IPT that hosts data for organizations other than the one to which it is associated must have the additional organizations configured before they can be used.
Edit organization
On this page a user having the Admin role can edit the organization. Click on the button labelled "Edit" to open the page containing the details of the selected organization. For explanations of the fields and selections on this form, refer to the information below.
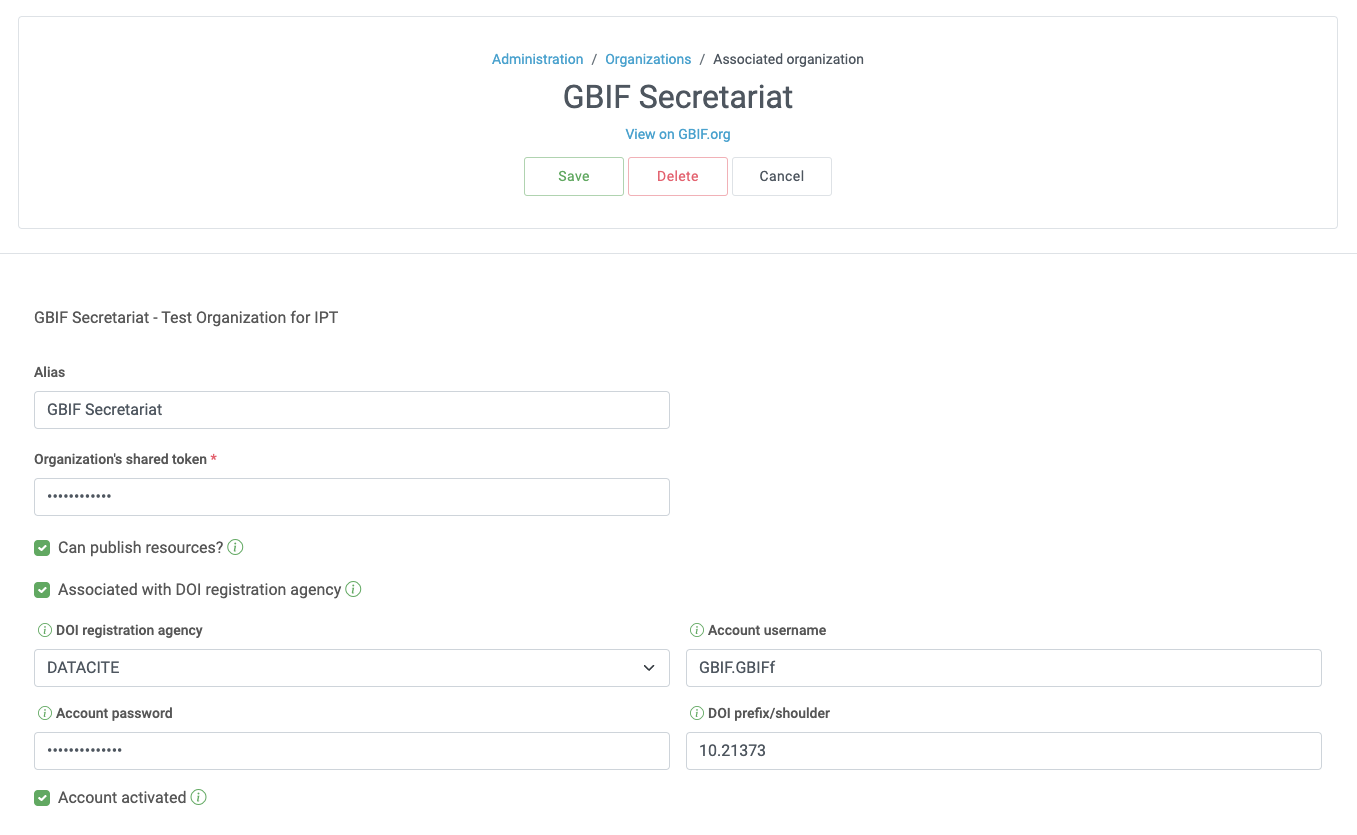
Following are explanations of the specific information to select or enter:
-
Organization name - the title of the organization as registered in the GBIF Registry. Note: this cannot be changed.
-
Organization shared token - the shared token that should be used to edit the entry for this organization in the GBIF Registry.
-
Organization alias - a name given to the organization for convenience within the IPT instance; aliases, rather then the full Organization Name appear in Organization selection lists in the IPT.
-
Can publish resources - this checkbox indicates whether the organization can be associated with resources in the IPT. Only those organizations having this box checked will appear in lists to be associated with resources.
-
DOI registration agency - the type of account used to register DOIs for resources; only DataCite is supported. Most publishers do not need this feature. Note: an account is issued to the organization after it signs an agreement with a DataCite member, which gives it permission to register DOIs under one or more prefixes (e.g. 10.5072) in one or more domains (e.g. gbif.org). Confirm that the account can actually register DOIs under the IPT’s domain/public URL otherwise registrations via the IPT won’t work.
-
Account username - the username (symbol) of the DataCite account issued to the organization.
-
Account password - the password of the DataCite account issued to the organization.
-
DOI prefix/shoulder - the preferred DOI prefix/shoulder used to mint DOIs. This prefix is unique to the account issued to the organization. Note: always use a test prefix when running the IPT in test mode.
-
Account activated - this checkbox indicates if this DataCite account is the only account used by the IPT to register DOIs for datasets. Only one DataCite account can be activated at a time.
Add organization
Organizations are not available to be associated with resources until a user having the Admin role adds them. Click on the button labelled "Add" to open a page on which an additional organization can be selected from the GBIF Registry to be used in this instance of the IPT. For explanations of the fields and selections on this page, refer to the information under the "Edit Organization" section above. After the desired organization is selected and all other data entered, including the shared token for the organization, click on the button labelled "Save" to add the selected organization to the list.

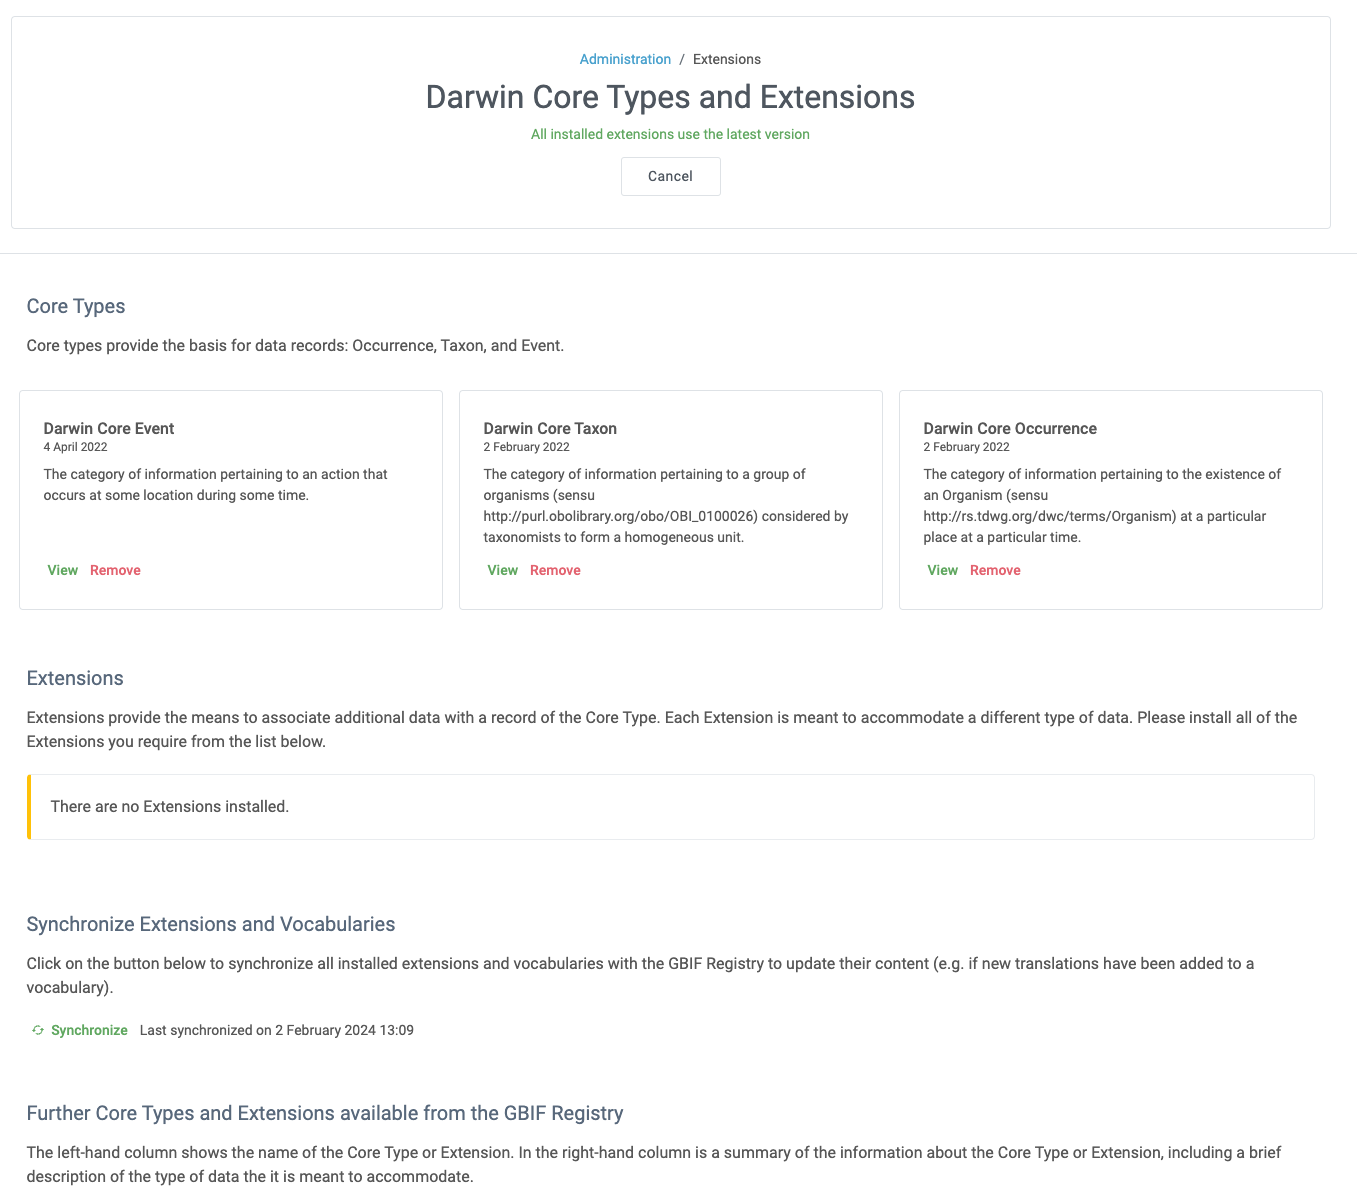
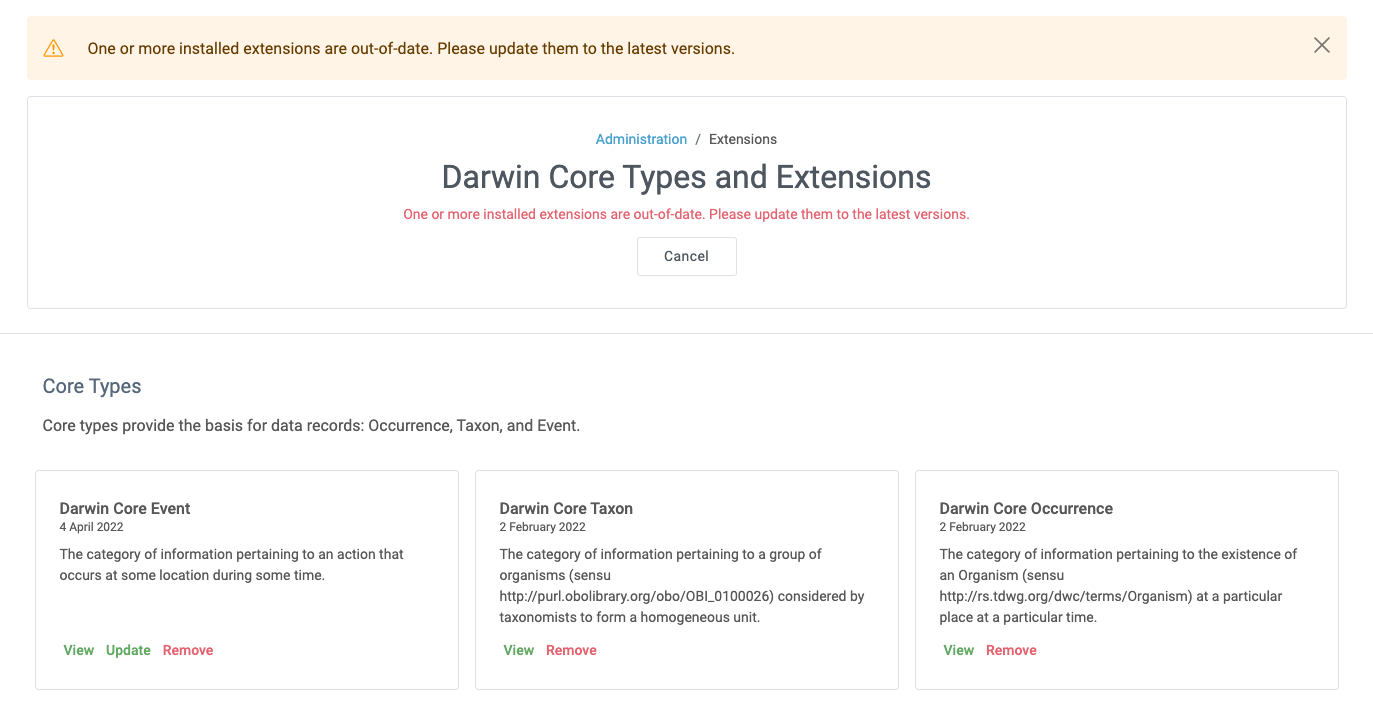
Configure Core Types and Extensions
This page allows a user having the Admin role to enable the instance of the IPT to import and share various pre-defined types of data from the GBIF Registry. Each type includes properties (fields, terms) that support a specific purpose. For example, the Darwin Core Taxon Core Type supports information pertaining to taxonomic names, taxon name usages, and taxon concepts and allows the IPT to host resources for taxonomic and nomenclatural checklists. A distinction is made between Core Types and extensions. Core types provide the basis for data records, (Occurrence, Taxon, and Event for example) while extensions provide the means to associate additional data with a record of the Core Type. Only one Core Type can be selected for a given resource as explained under the "Darwin Core Mappings" heading of the "Resource Overview" section.
Vocabularies contain lists of valid values that a particular term in a Core Type or Extension can take. For example, the Darwin Core Type vocabulary contains all of the standard values allowed in the Darwin Core term basisOfRecord.
Following the lists of installed Core Types and Extensions, there is a section labelled "Synchronize Extensions and Vocabularies" having a single button labelled "Synchronize". The latest versions of Core Types and Extensions that exist in the GBIF Registry but have not yet been installed are listed below the Vocabularies section.
The lists of extensions (installed and not installed) each have two columns. The left-hand column shows the name of the extension as a link and a button labelled either "Install" or "Remove". If the extension is out-of-date, another button labelled "Update" will also appear. In the right-hand column is a summary of the information about the extension, including a brief description of the type of data the extension is meant to accommodate, a link to more information about the extension if it exists, the date it was issued (released), the number of properties (fields, terms) in the extension, the name of the extension, its namespace, RowType, and keywords. For more information about these attributes of an extension, see the documentation on Darwin Core Archives at http://rs.tdwg.org/dwc/terms/guides/text/. Following are the actions that can be taken with respect to extensions:
Synchronize Extensions and Vocabularies
An extension can make use of lists of terms of predefined values, known as controlled vocabularies. Periodically these vocabularies may also change (e.g. if new translations have been added) and require updating in the IPT. Click on the button labelled "Synchronize" to synchronize existing vocabularies with the GBIF Registry. After the update is complete, a message will indicate if the synchronization was successful or if there were any errors.
View extension details
The title of each extension in the first column is a link to a detail page for that extension. The detail page shows all of the summary information that can be seen in the right-hand column of the extensions list as well as the detailed description, references, and examples for each of the properties in the extension.
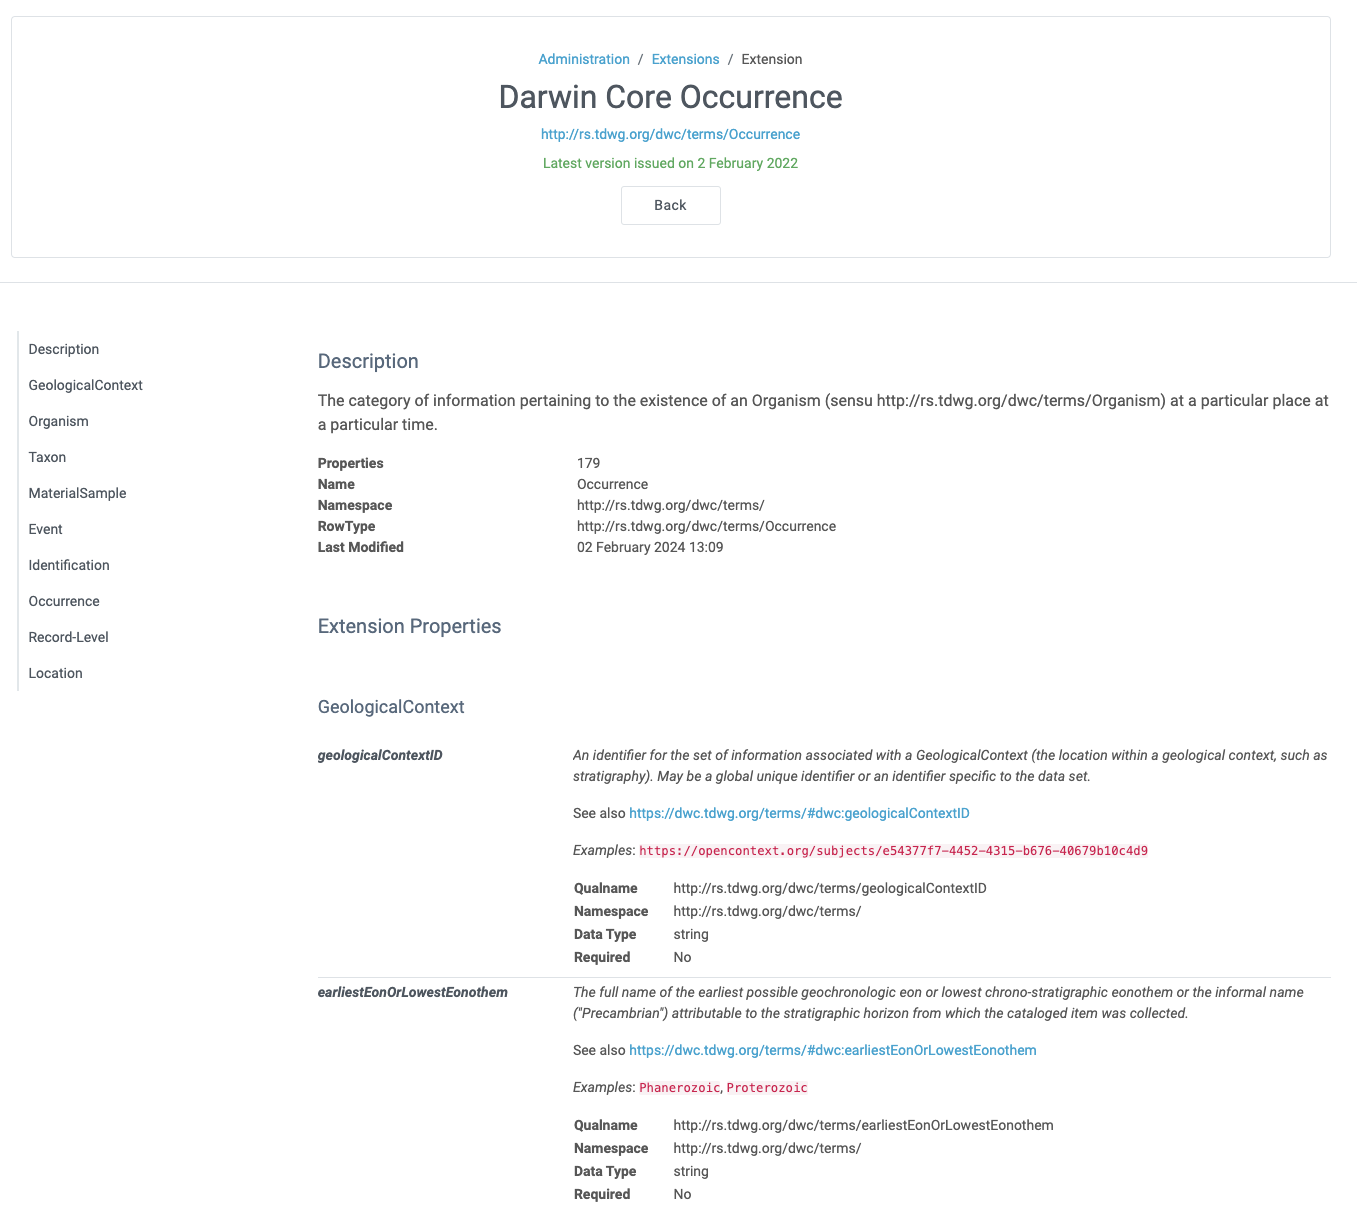
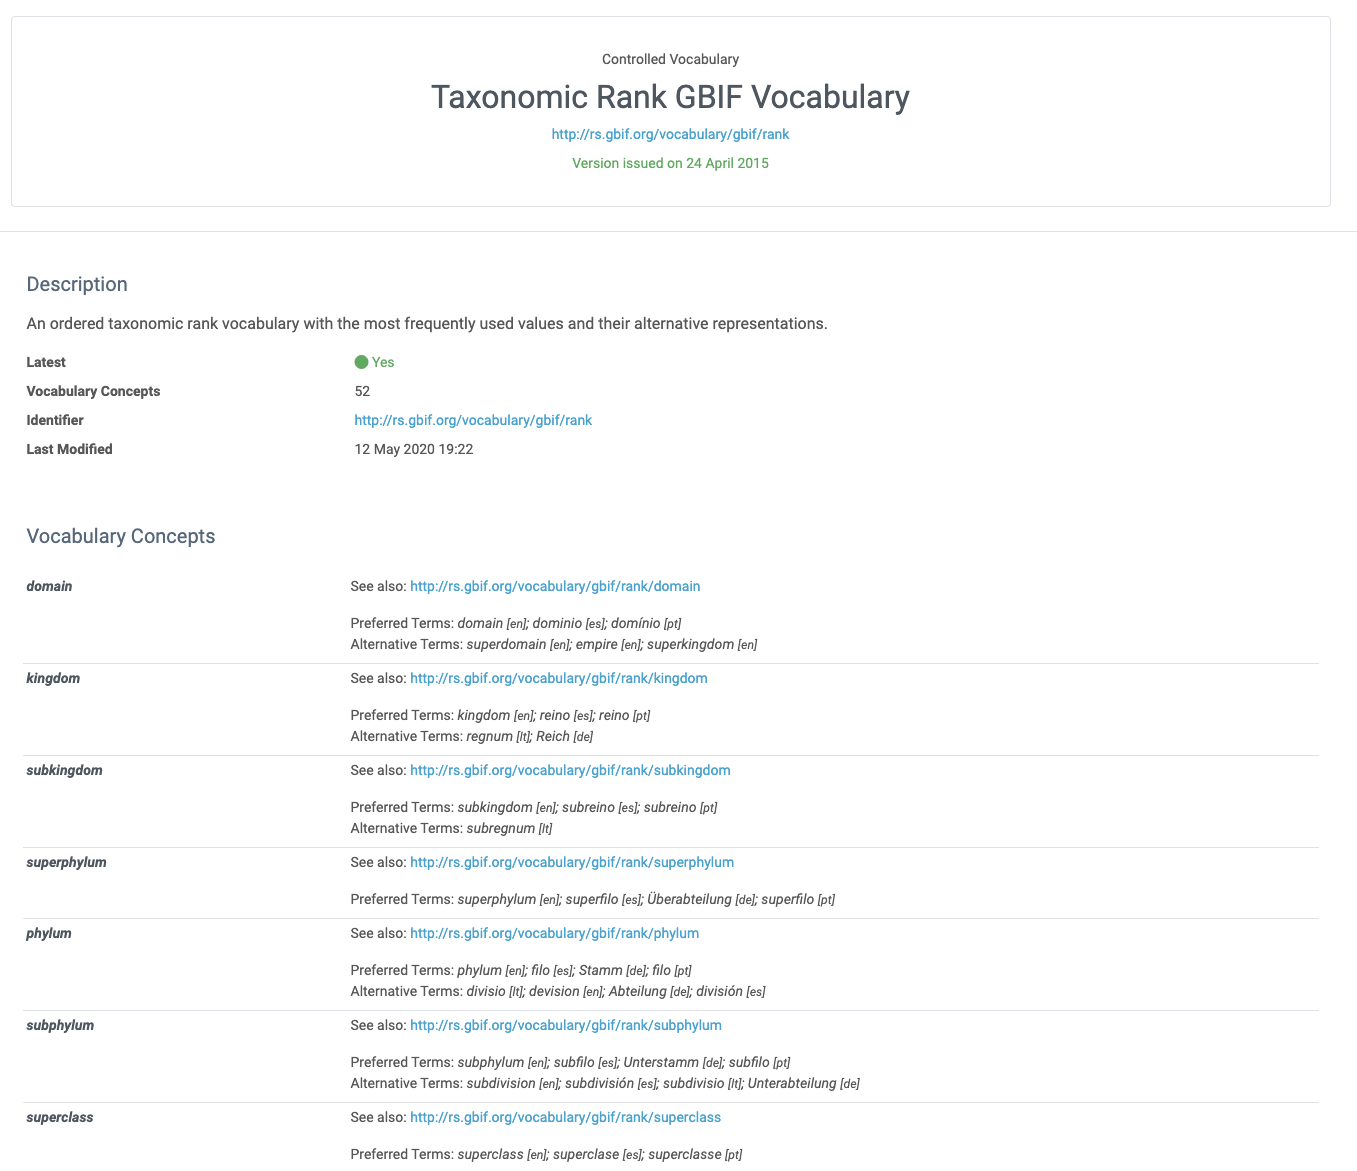
For properties that have controlled vocabularies, the property information in the right-hand column will contain the name of the vocabulary as a link next to the label "Vocabulary:". Clicking on the link will open a detail page for the vocabulary, with a summary of the vocabulary at the top and a table of the valid values with further detailed information such as preferred and alternate terms and identifiers.
Install extension
For any of the extensions that have not yet been installed in the IPT, there is a button labelled "Install" under the extension name in the left-hand column. Click on this button to retrieve the extension from the GBIF registry and install it in the IPT.
Remove extension
For any extension that has already been installed in the IPT, it can be removed by clicking the button labelled "Remove". Extensions that are in use to map data for any resource in the IPT cannot be removed. Any attempt to do so will show an error message and a list of resources that use the extension in a mapping.
Update extension
For any extension that has already been installed in the IPT, and is out-of-date, it can be updated by clicking the button labelled "Update". Updating an extension makes it possible to take advantage of any new terms and new vocabularies. During an update, existing mappings to deprecated terms will be removed, and existing mappings to deprecated terms that have been replaced by another term will be automatically updated. Following the update, all affected resources should be reviewed and republished.
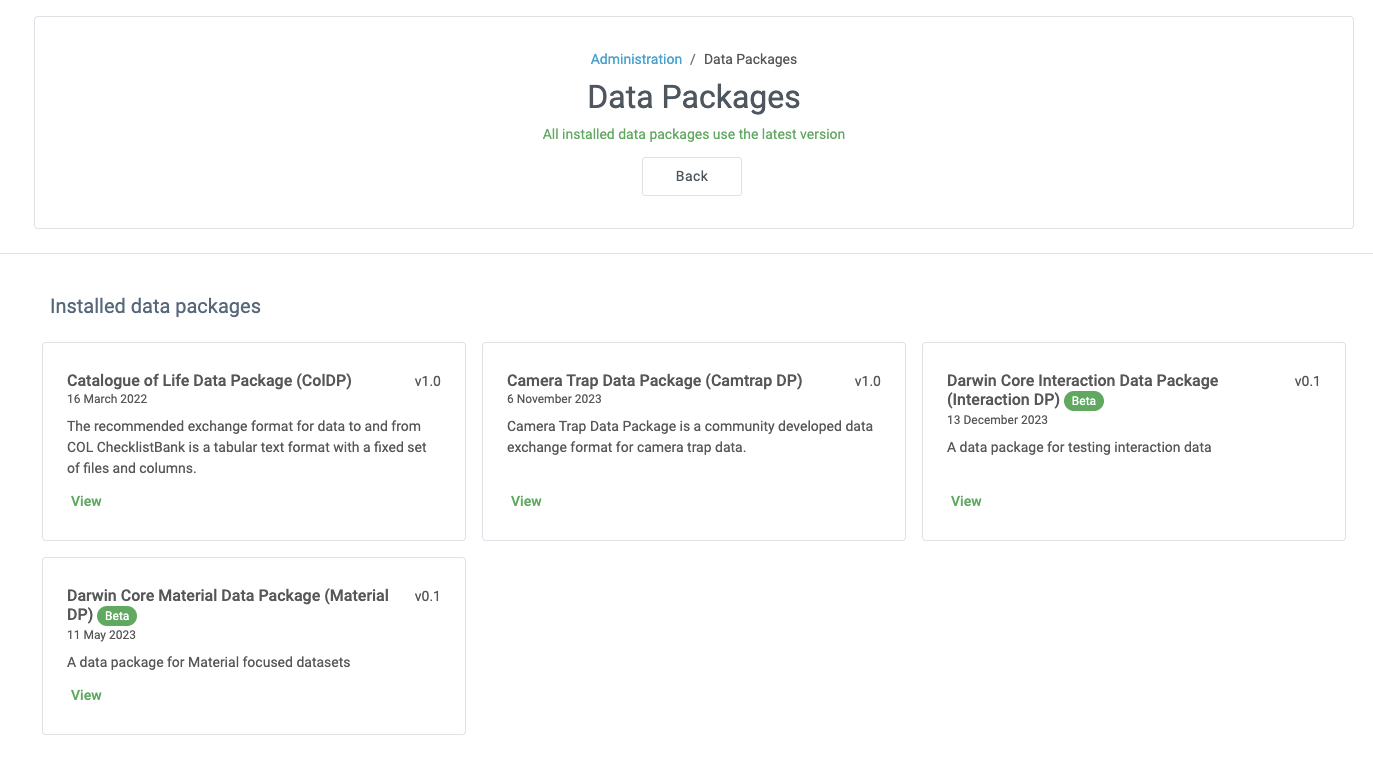
Data Packages
This page allows a user having the Admin role to enable the instance of the IPT to import and share various pre-defined types of data from the GBIF Registry. Each type includes properties (fields) that support a specific purpose.
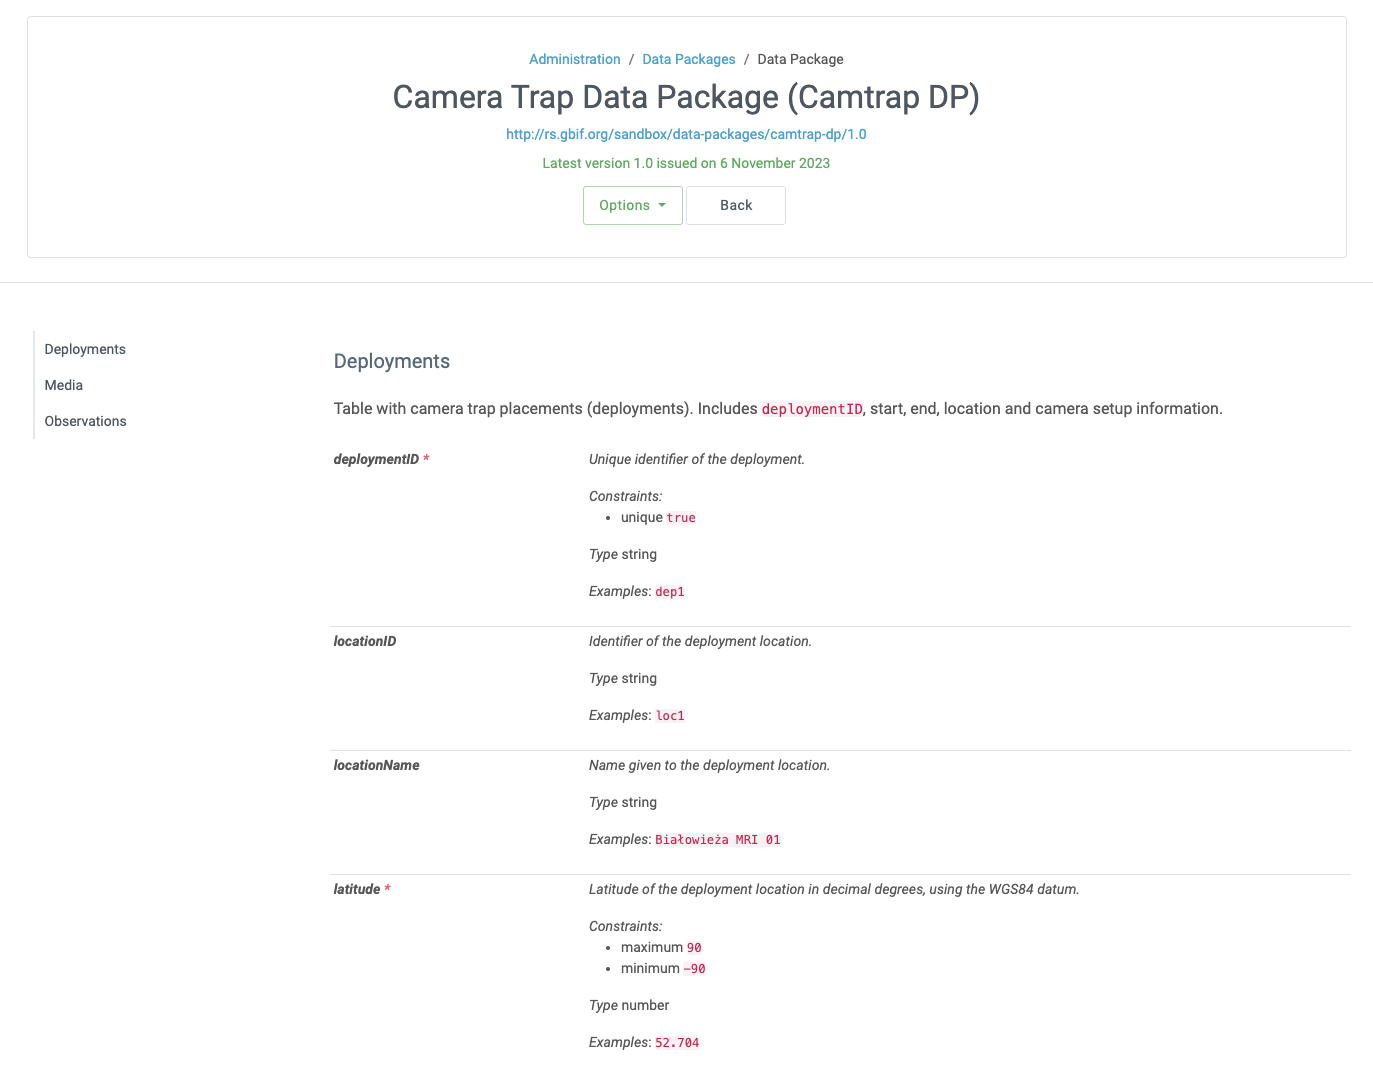
Details page:
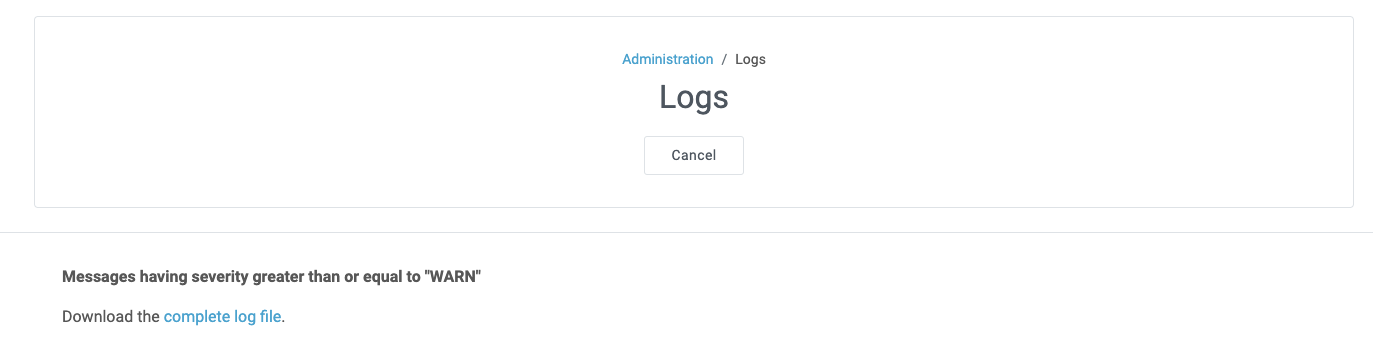
View IPT logs
Messages generated from actions taken while running the IPT are logged to files for reference in the directory called "logs" within the IPT data directory (see the information under the "IPT Settings" heading in the "Administration Menu" section). The View IPT logs page shows messages from the file called admin.log, which contains only those log messages that have a severity of WARNING or greater (such as errors). The complete log of messages (contained in the file called debug.log) can be opened and viewed by clicking on the link labelled "complete log file". The contents of the complete log file may be useful when reporting an apparent bug.